Step 1: How to Select & Manage Widget Templates in Boost AI Search & Discovery
📖 Optimizing your storefront with Boost AI Search & Discovery starts with selecting the right template for your theme. This foundational step ensures that the app’s widgets align with your store’s design, enhancing both aesthetics and functionality.
On this page
Overview
To effectively use Boost features on your storefront, three key steps are recommended. Starting with Step 1: Select a template that serves as the base for Boost widgets, influencing their design and compatibility with your store. These templates can be tailored to fit your brand's style and requirements.
Set up templates for your theme
Select your theme
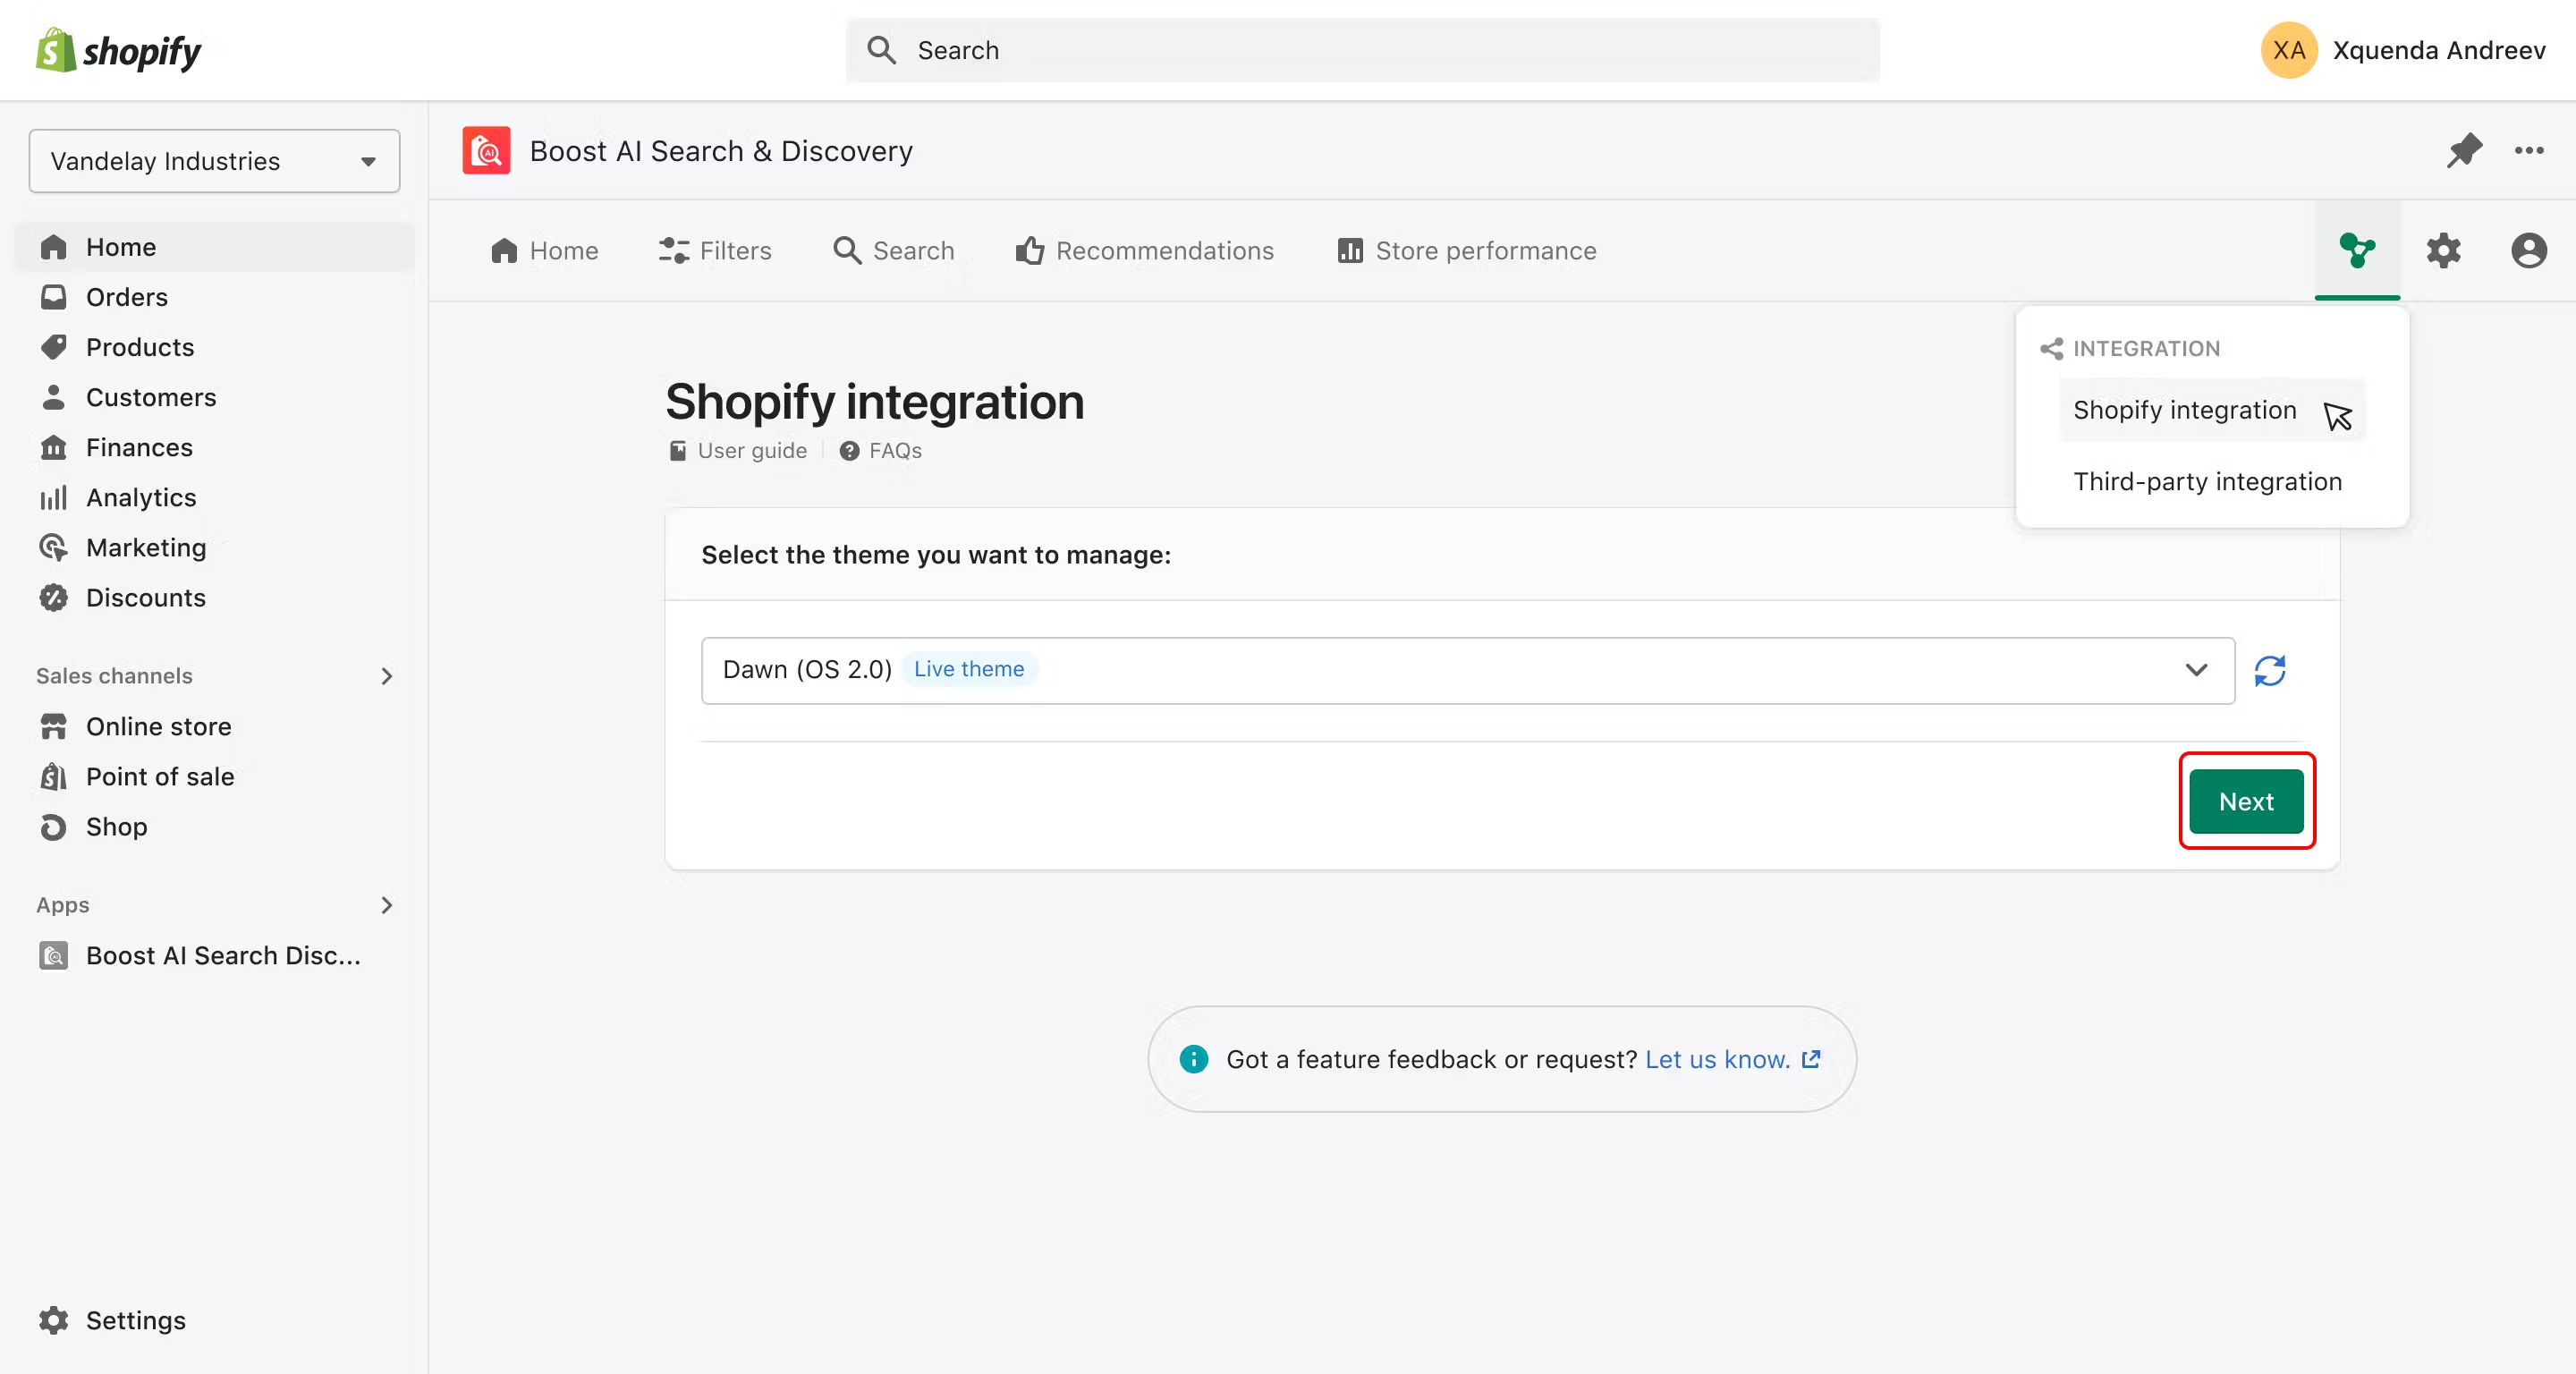
- Access Boost App Dashboard, navigate to Integration menu > Shopify Integration.
- Select your desired theme from Select the theme you want to manage section; your live theme is set by default.
- Click Next to proceed.
Choose a template
- Click Select Template to view available options

- Choose between Boost’s Default and Basic templates or select from your added templates
- Boost templates
- We currently offer two options: Default and Basic. You can preview how the pre-designed layouts look by clicking the View hyperlink.
- Added by you (Template Library)
- Manage them by clicking the Manage template button. Learn more here.
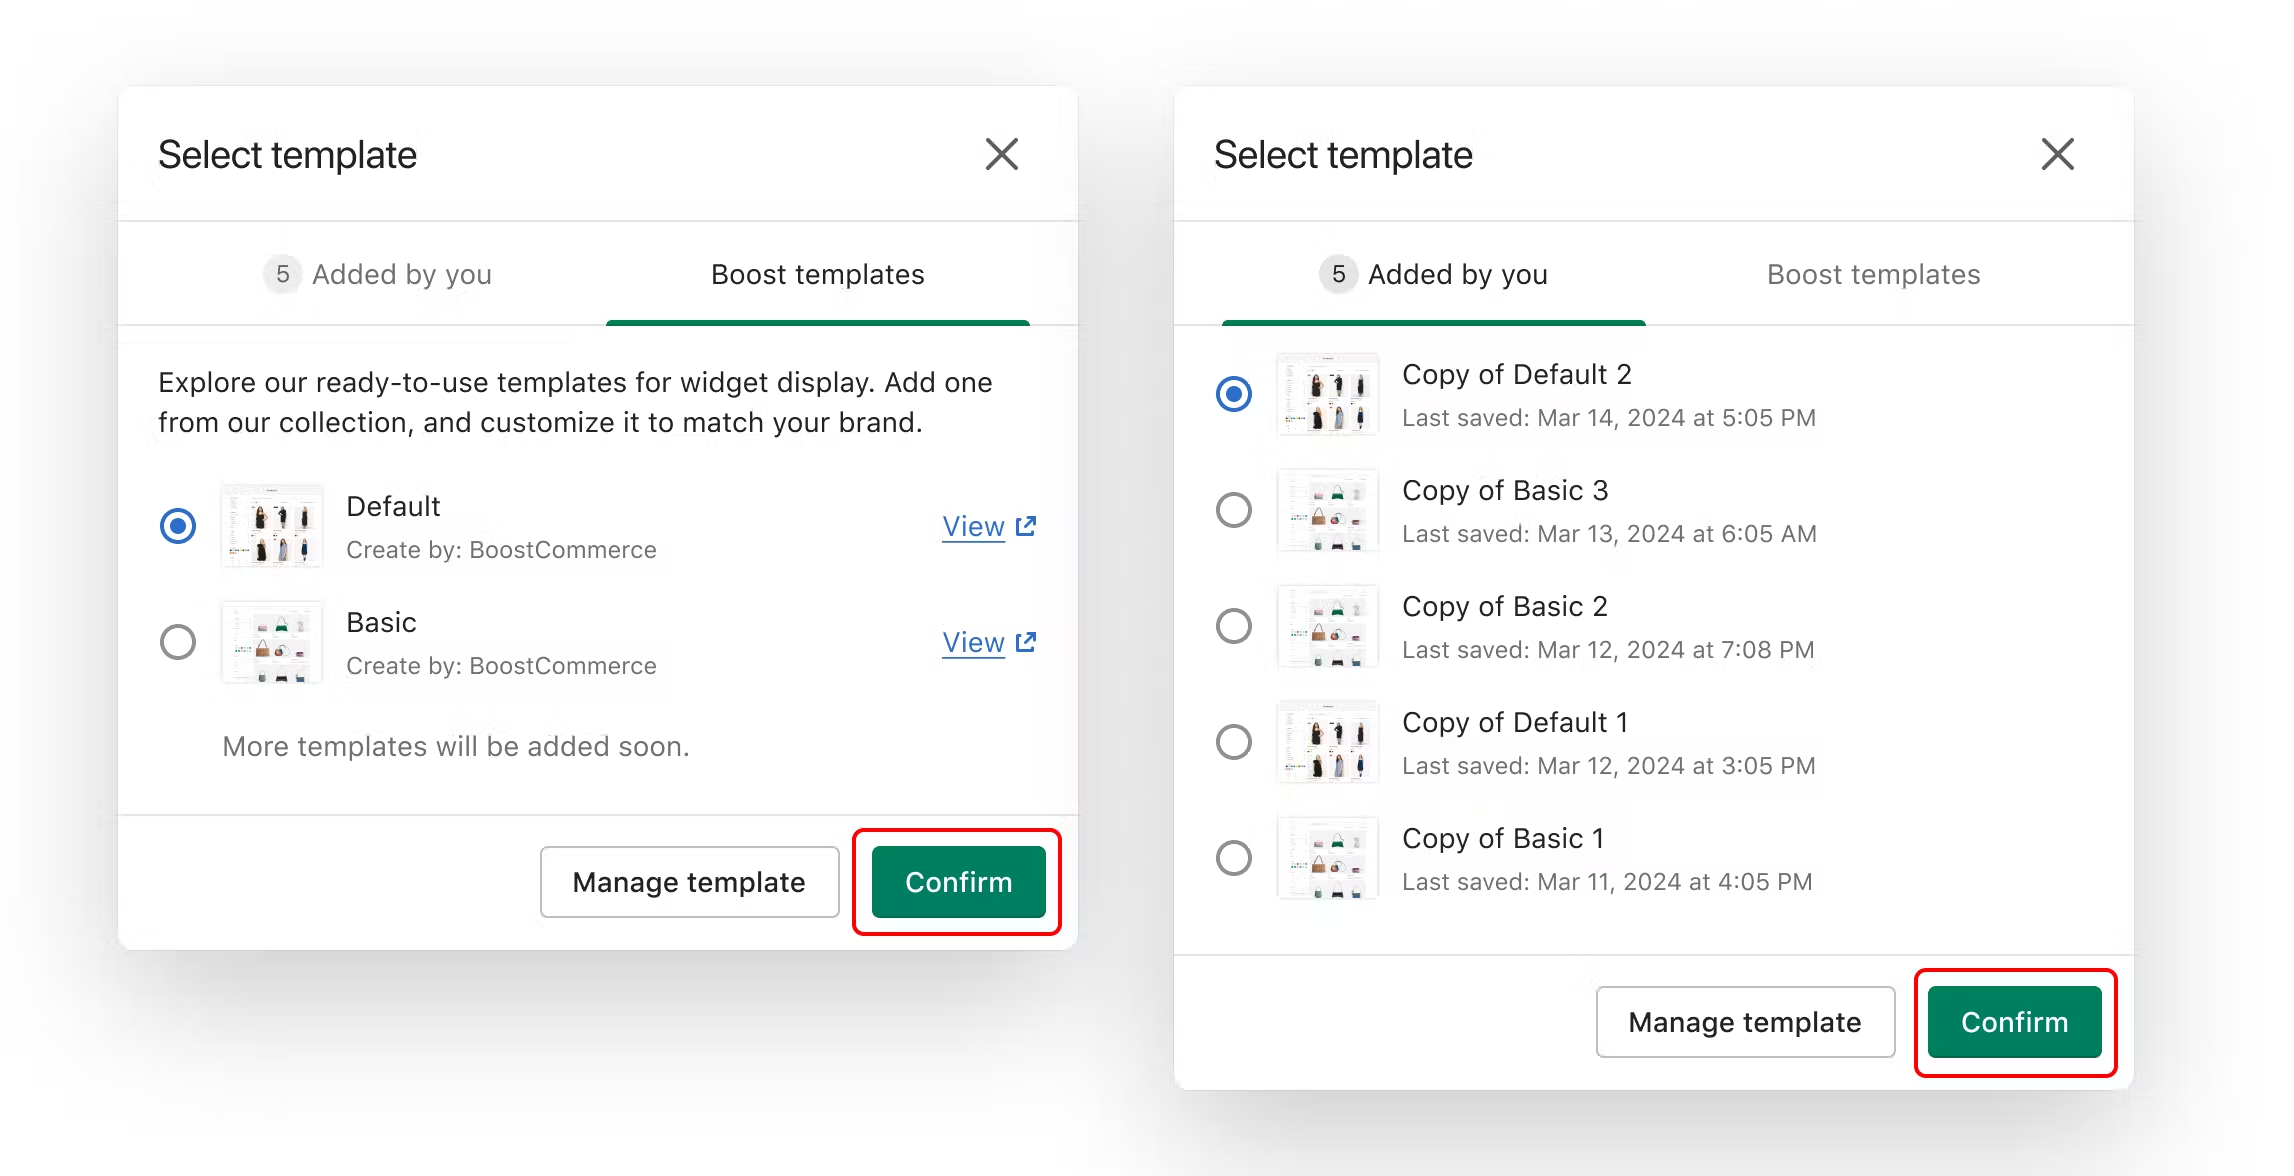
- Confirm your choice by clicking Confirm.
⚠ Notes
- You can apply a single template, like "Copy of Basic," to various themes, including both active and unpublished ones, such as "Dawn" and "Refresh," for instance.
- Be mindful that the template library has a cap of 25 templates. Exceeding this limit triggers a "Maximum limit reached" alert, prompting you to delete unused templates to make room for new ones.
- The template you've just selected is now listed in Select template step.
- Click Customize to customize its design using our Boost Visual Editor.
- Click Change to switch to a different template applied to your theme.
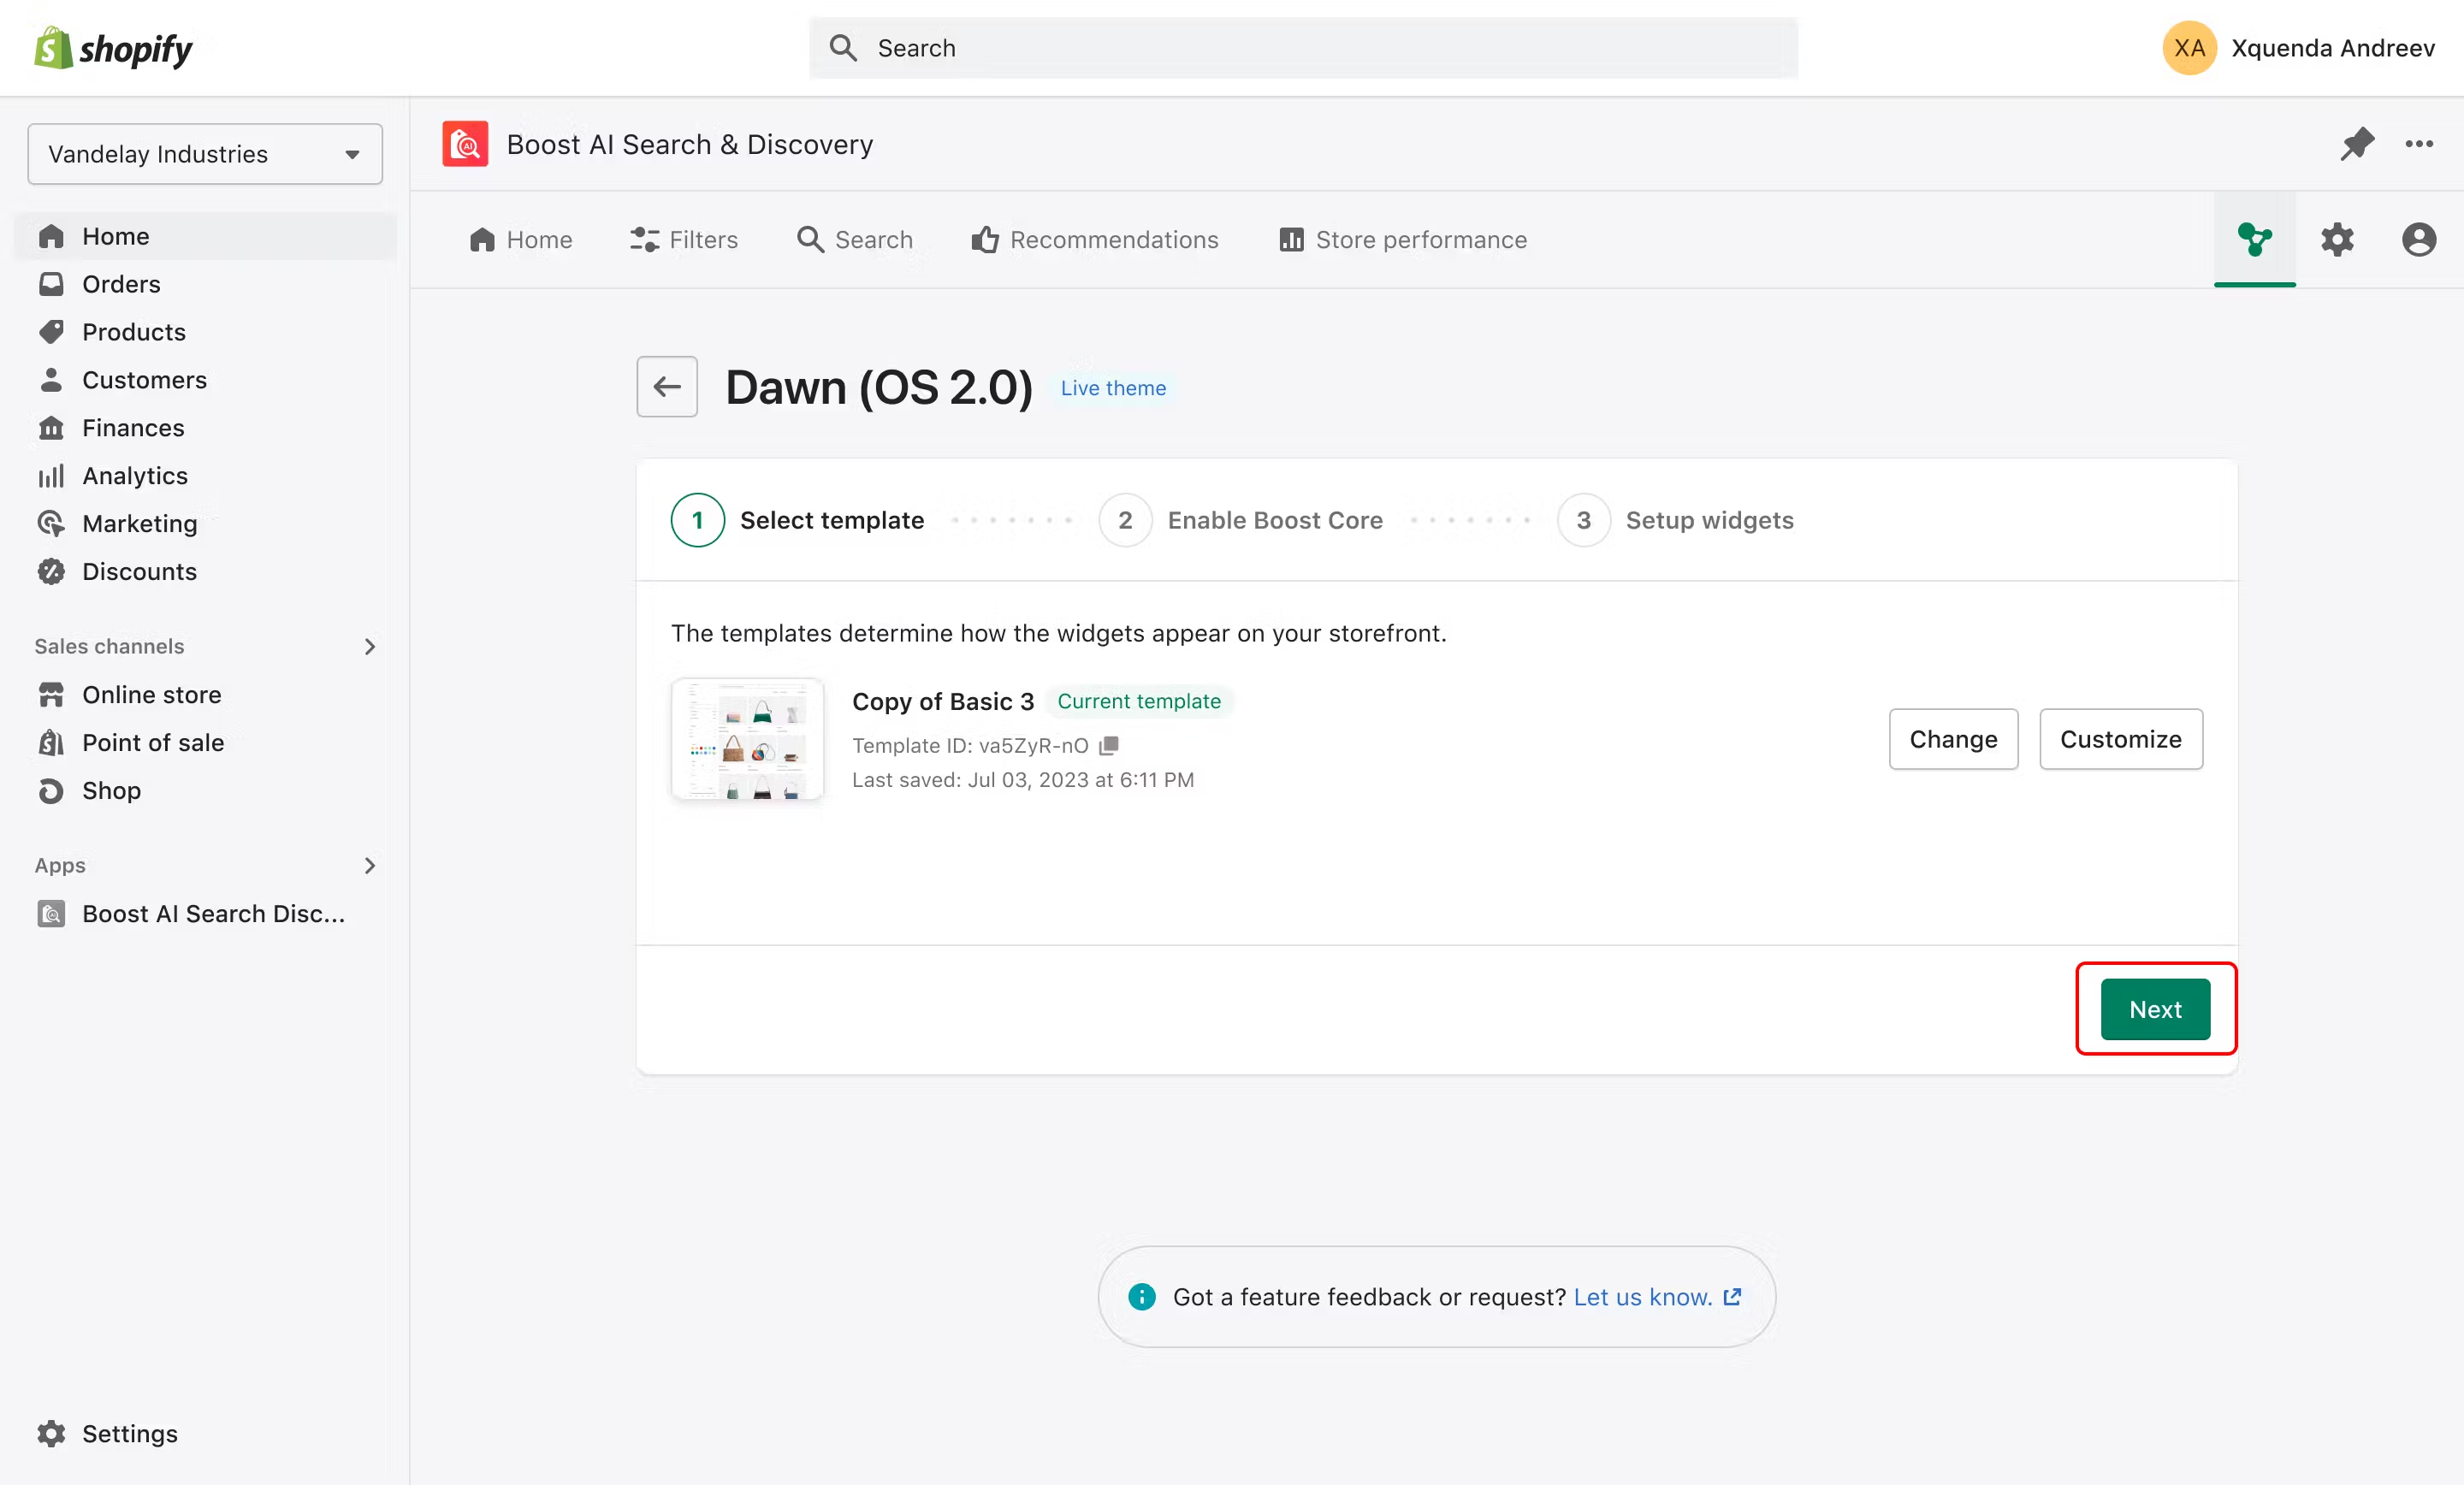
- Click Next to proceed to Enable Boost Core step.
💡 Each template is assigned a unique ID. When you select a template for your theme, this ID links automatically to our core application, enabling Boost widgets to be displayed seamlessly on your theme.
Manage templates in your Library
To access Template Library, go to our app Dashboard > Integration menu > Shopify Integration > find [Target Theme] > click Next > click three-dot icon > click Manage template.
Your Template Library contains all templates you've added. The library allows for easy management, including previewing, customizing, duplicating, renaming, or removing templates.
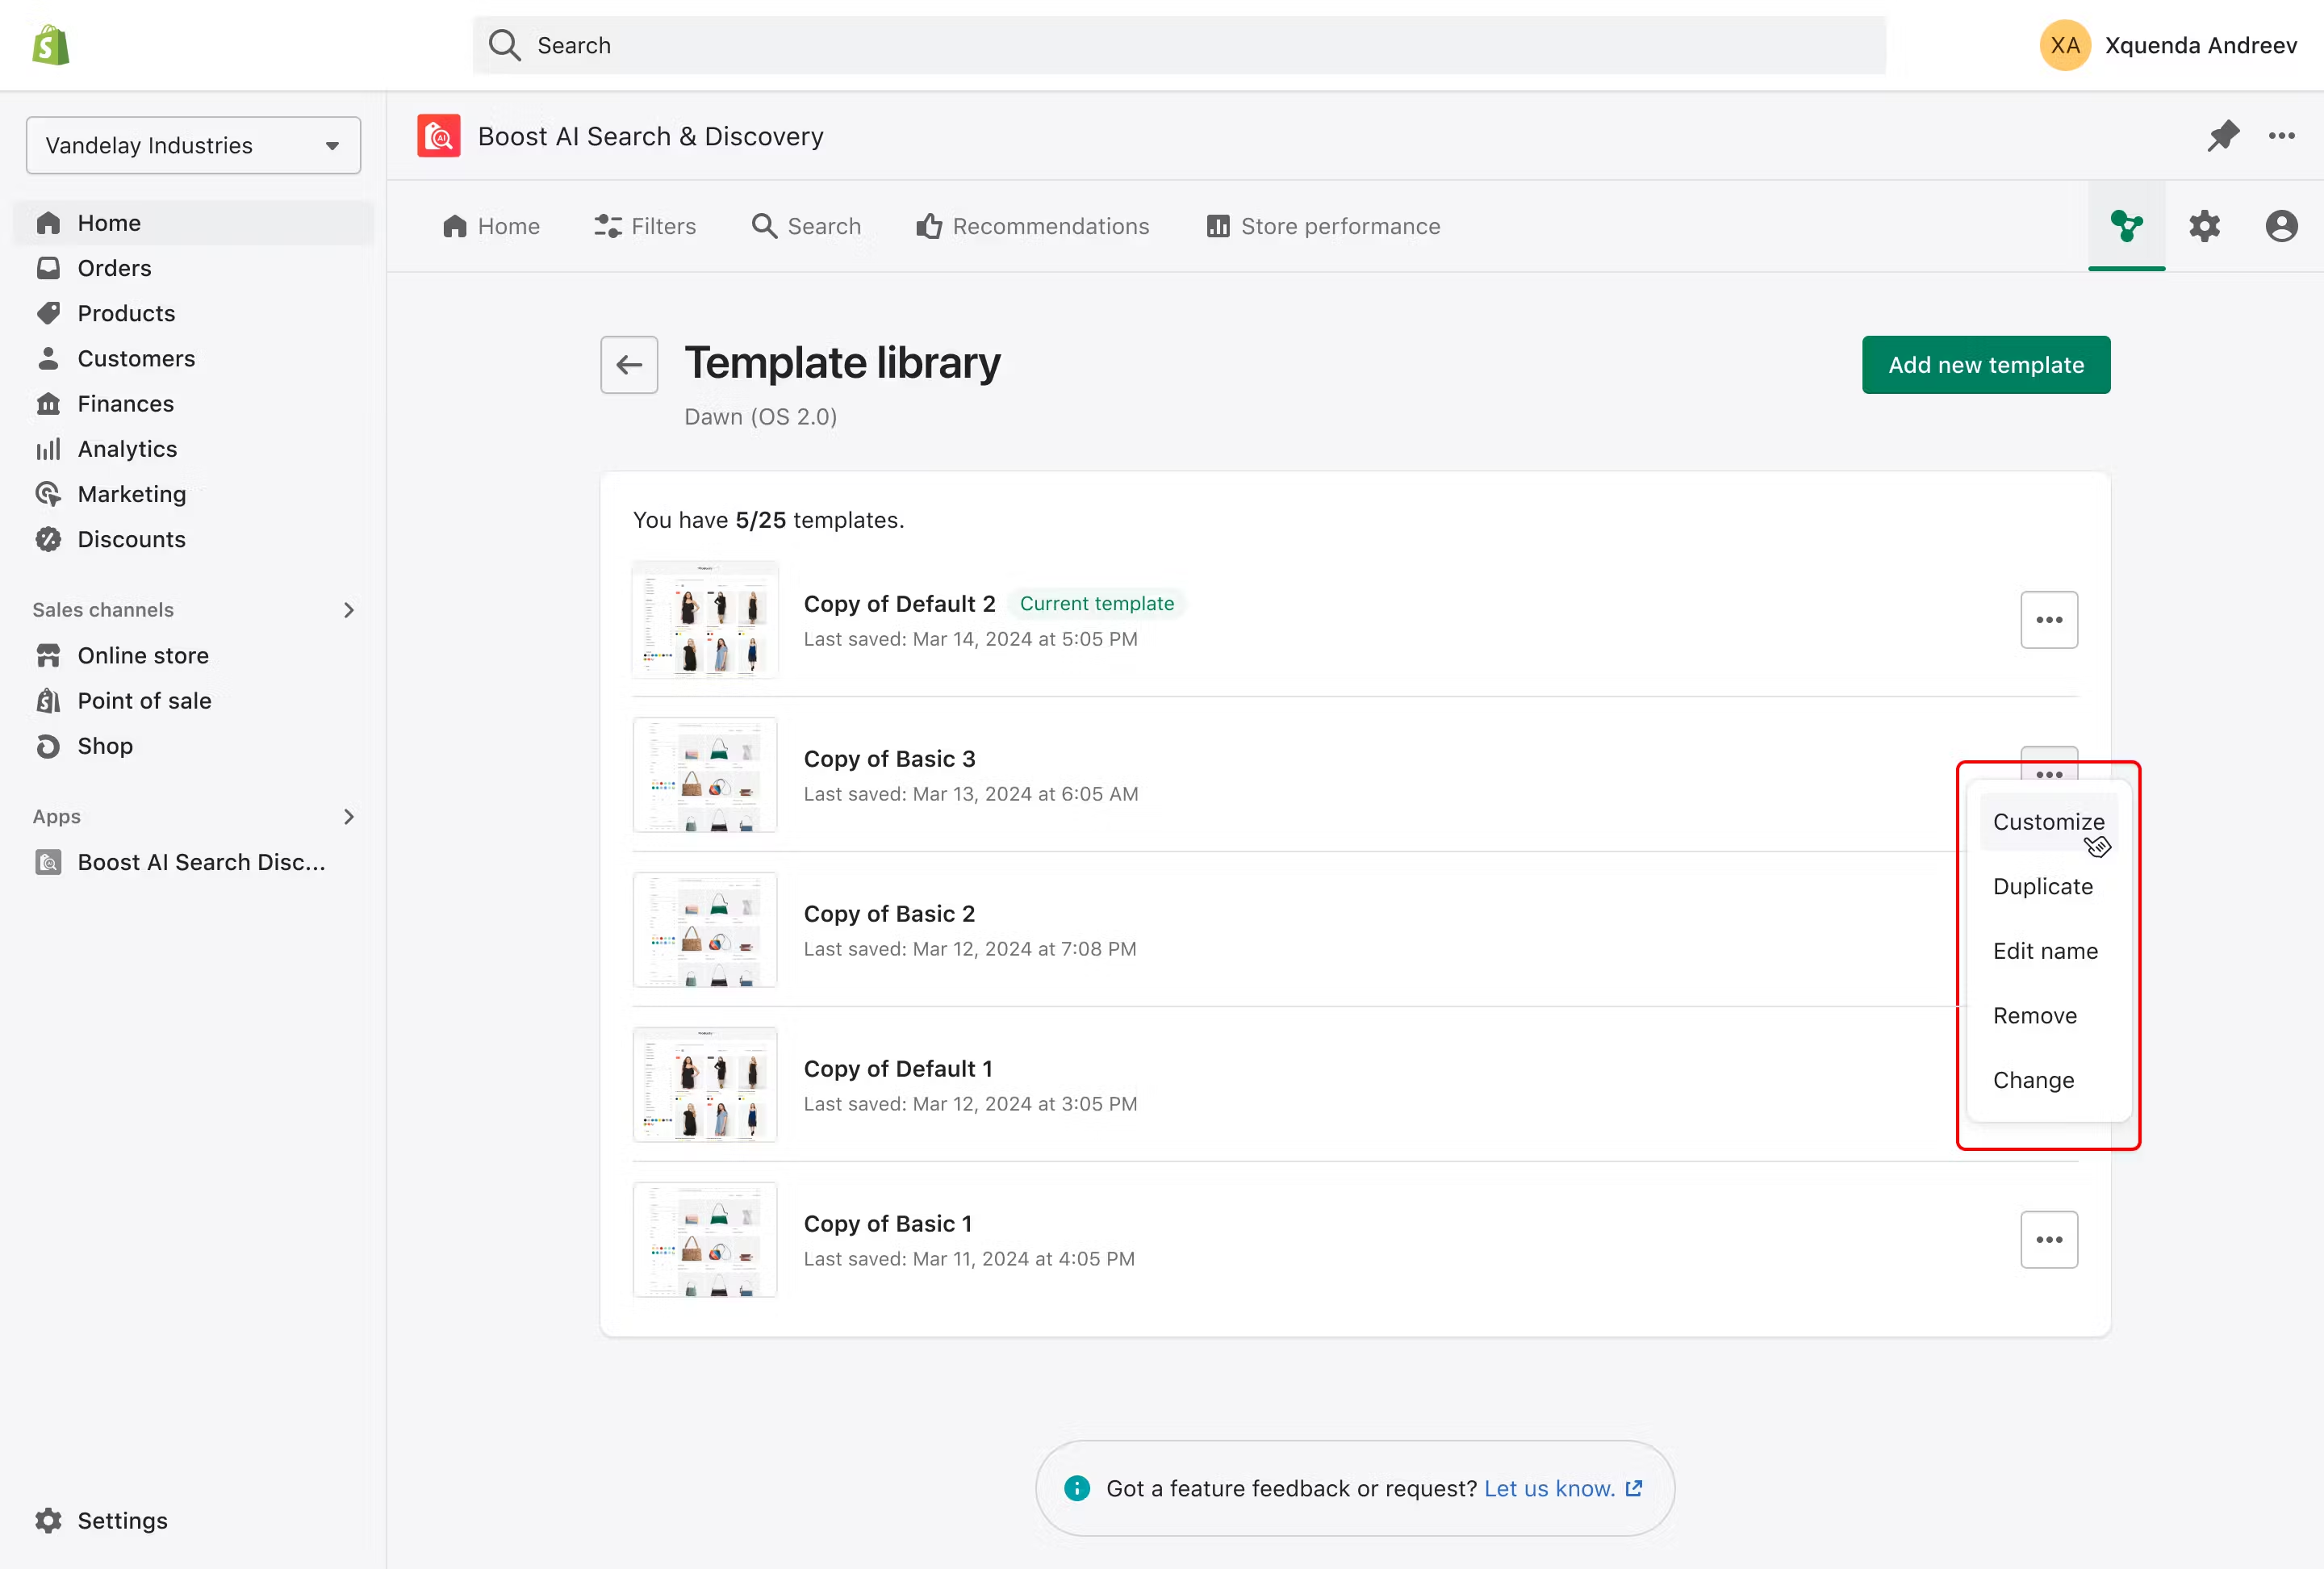
Detailed actions
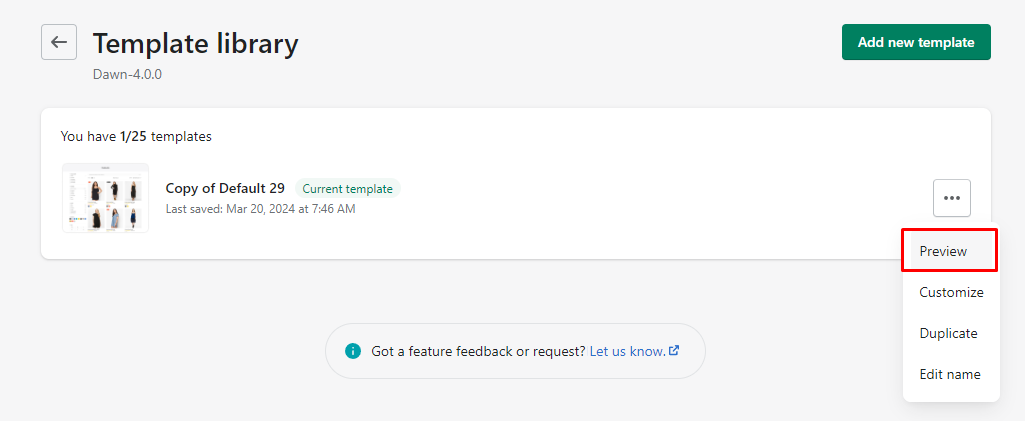
| Preview | See how templates look on your site |
|---|---|
| Customize | Modify template settings to fit your brand with Visual Editor |
| Duplicate | Create copies for different customization needs |
| Rename | Easily identify templates by assigning unique names |
| Remove | Delete unneeded templates to maintain clarity |
| Change | Switch between templates for different themes |
| Add new templates | Expand your selection by adding more from Boost’s offerings |
Preview
Customize
Click the three-dot icon menu on the right side of a template > Select Customize. This will open the Visual Editor tool, where you can customize the typography, colors, product grid, etc., according to your preference.
⚠ A template linked to multiple themes will apply its UI changes to all associated themes. For separate customization, duplicate the template and link it individually to each theme.
Duplicate
Click the three-dot icon menu on the right side of a template > Select Duplicate. A clone version of the original template will be added to your library with "Copy of" added before its original name.
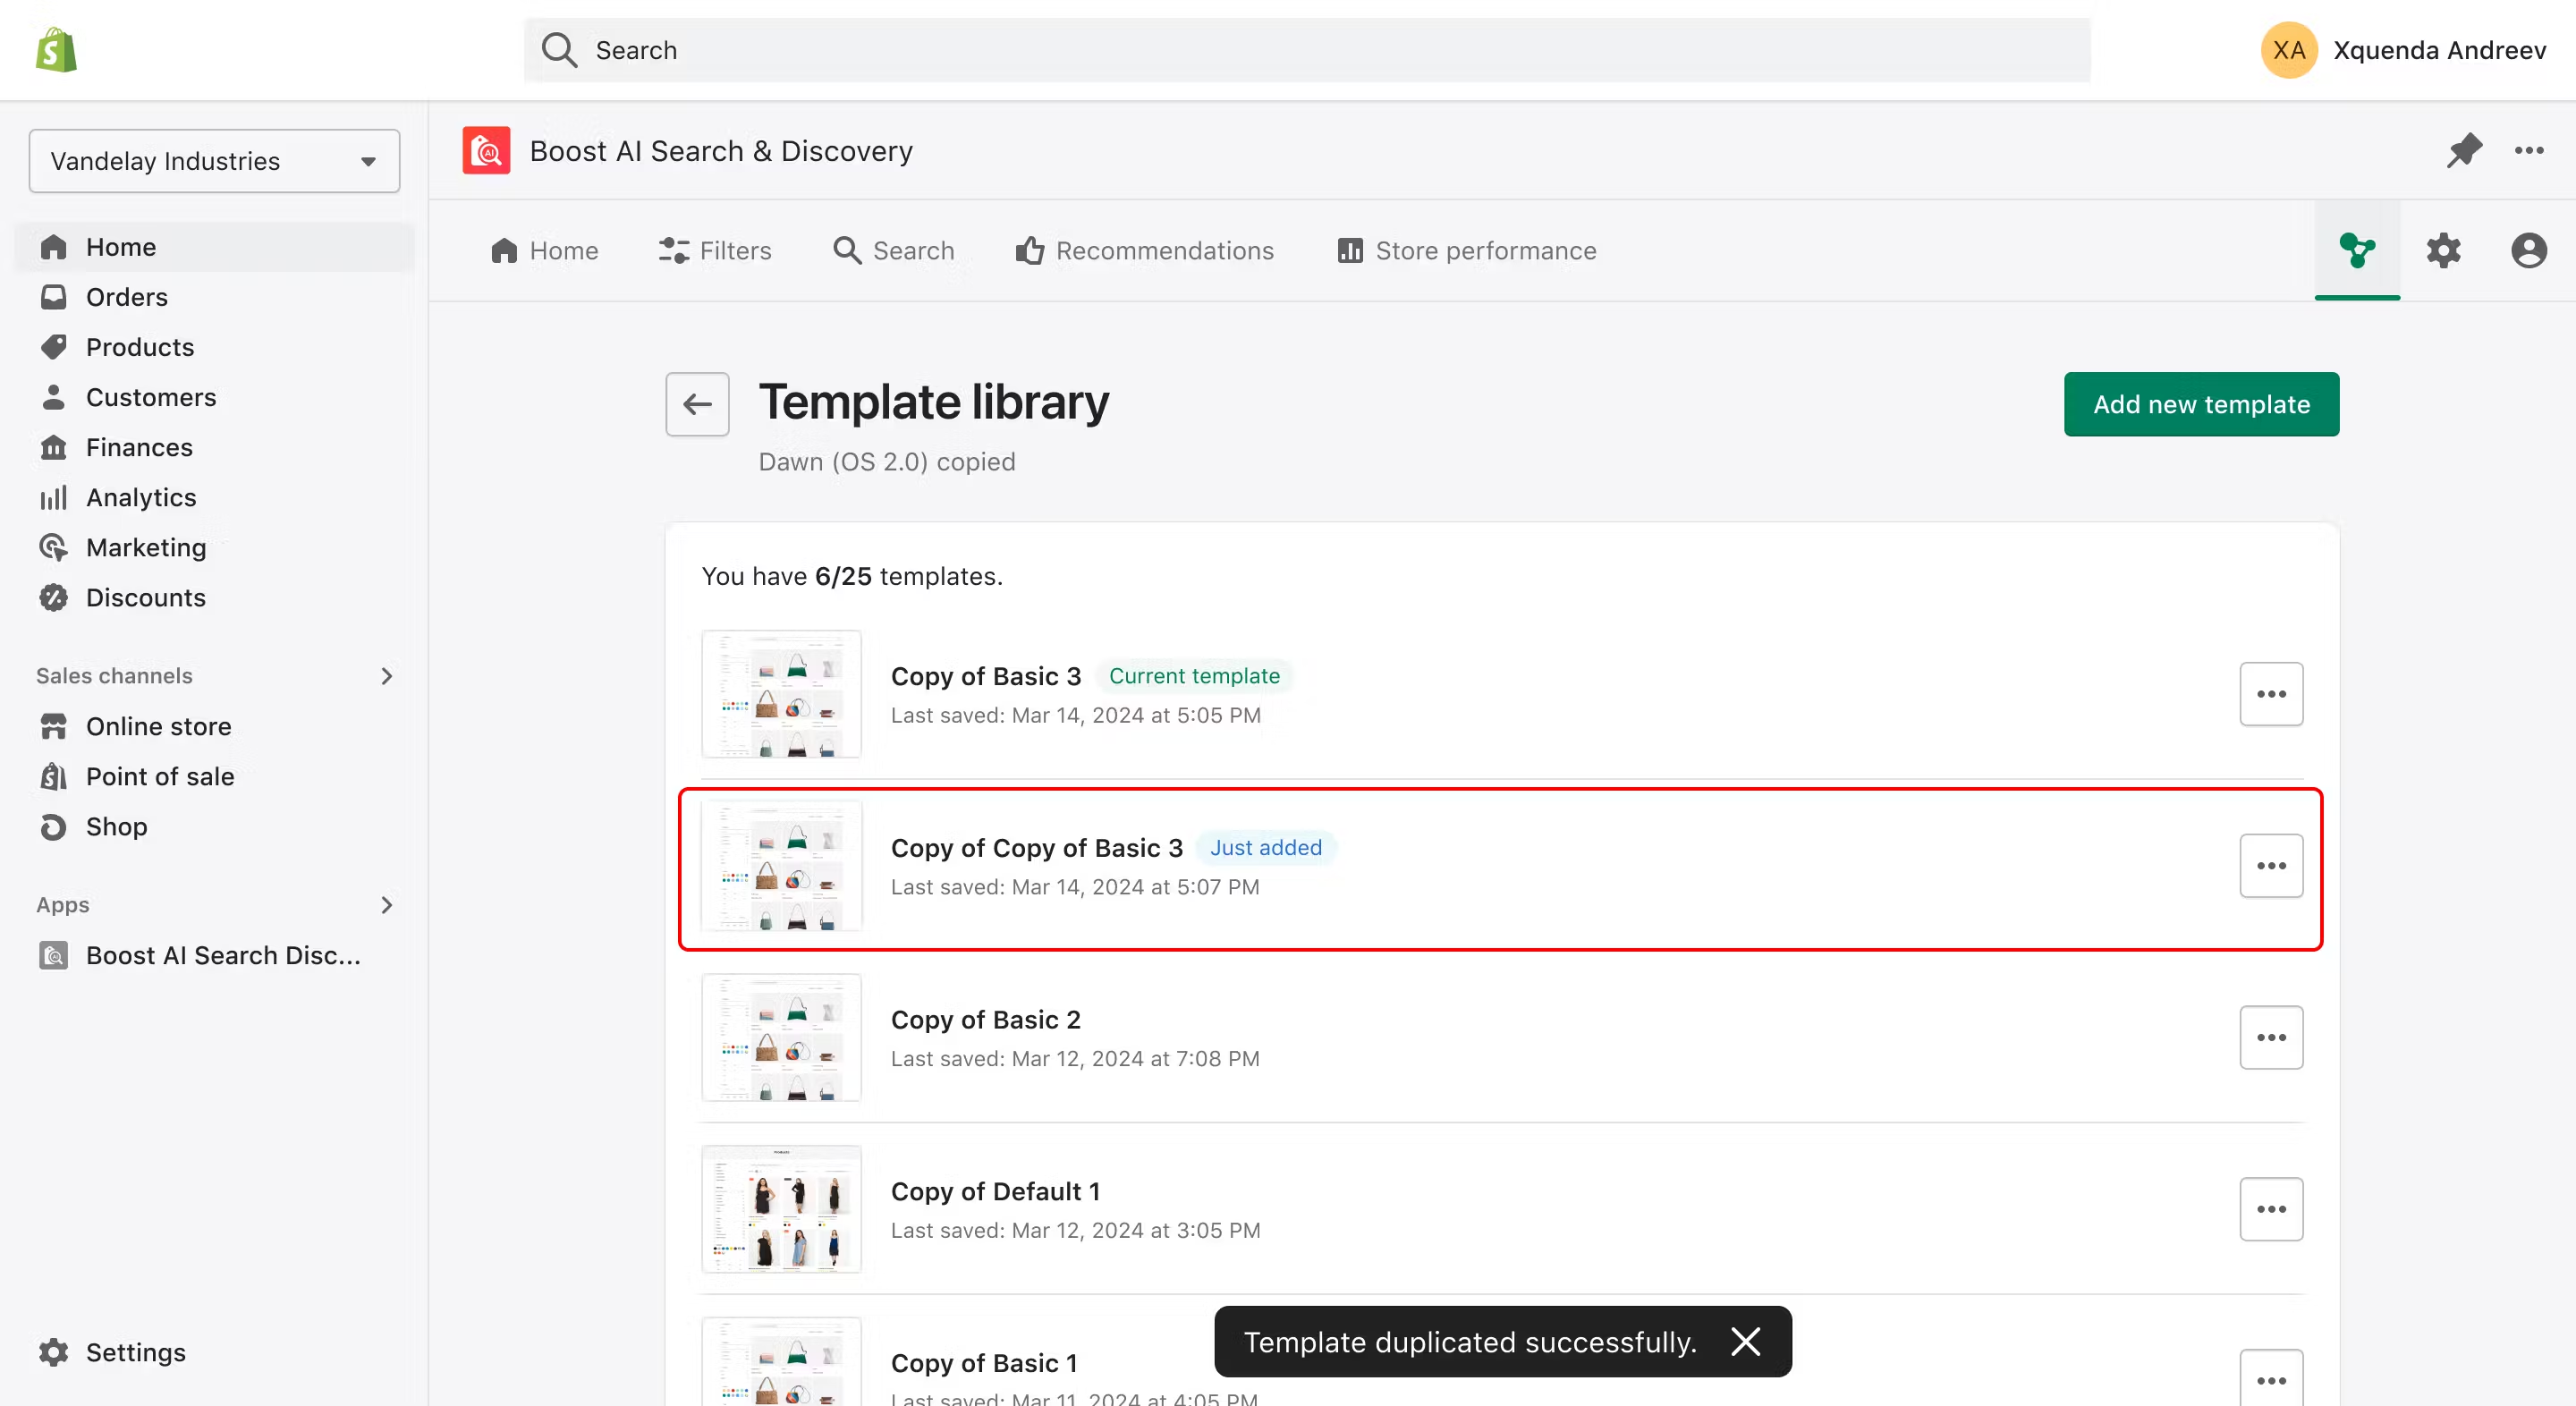
⚠ Your library can hold up to 25 templates. If this limit is reached, the Duplicate option will be disabled. To add new templates, please remove any that are not in use.
Rename
⚠ The maximum number of characters allowed is 50.
Remove

⚠ Templates linked to your live theme cannot be removed. Deleting a template also removes its link from any associated unpublished themes, with a prompt for confirmation.
Change
⚠ This option is not available for your Current template.

💡 Once you update the template, the corresponding template ID within our core application will automatically refresh to align with your new selection. Verify the updated ID by navigating to the Go to Boost Core option.

Add new template
Click the Add new template button in the upper right corner to add more templates to your Library.
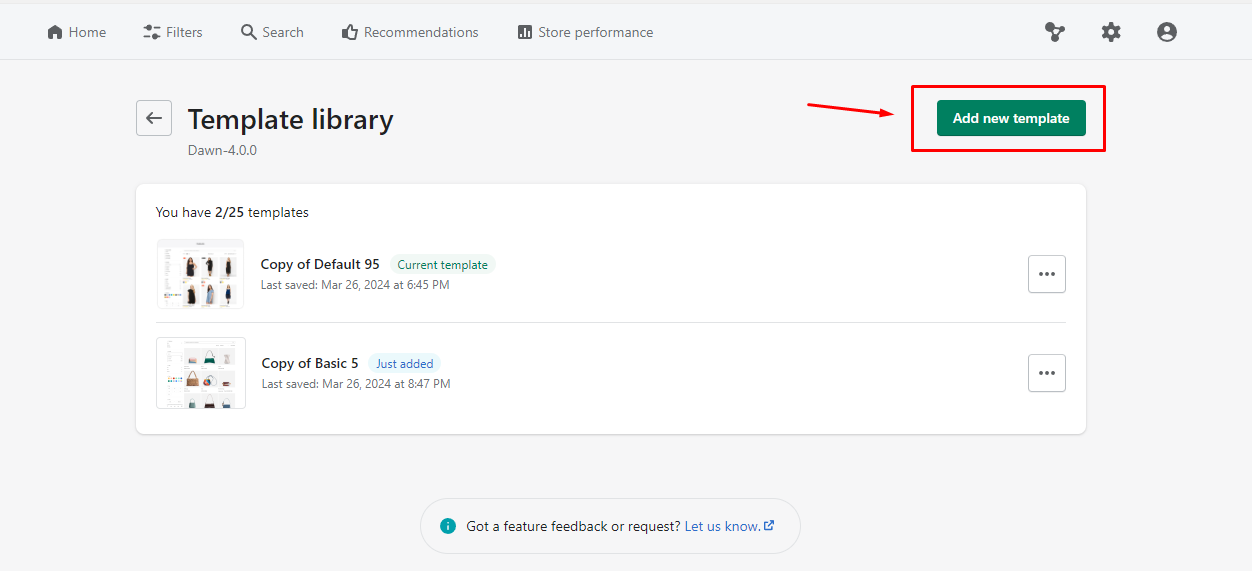
Afterwards, follow the steps from Choose your template to finish adding a new template.
If you have any questions or need further assistance, please do not hesitate to contact our dedicated support team at support@boostcommerce.net.